
WPForms MailPoet Addon v1.0.0 - WordPress Plugin
FacebookLinkedInTweet Do you want to easily add MailPoet WordPress subscribers from your forms?
Same brand
More from WPForms
WPForms Pro - The World's Best Drag & Drop WordPress Form Builder
by WPForms
WPForms is the best WordPress contact form plugin.
WPForms PDF Addon - WordPress Plugin
by Umair Majeed
Would you like to generate professionally formatted PDFs from your form entries?
WPForms Google Sheets Addon - WordPress Plugin
by WPForms
The WPForms Google Sheets addon makes it easy to send form entries and leads to a Google Sheet.
Related items
Related Forms Plugins
Gravity Forms - The Best WordPress Form Plugin
by Rocketgenius
The Easiest Tool to Create Advanced Forms for Your WordPress Powered Website.
Fluent Form Pro Addon - Fastest & Most Powerful WordPress Form Plugin
by WPManageNinja
WP Fluent Forms Pro addon is the premium addon to fastest and most intuitive plugin for WordPress form building.
Formidable Forms Pro - WordPress Form Builder
by Strategy11
Customizable You have complete control over what your views look like and how they behave with Formidable Forms Pro Sortable Easily display your form entries, then sort them or make them searchable.
FacebookLinkedInTweet Do you want to easily add MailPoet WordPress subscribers from your forms? You can seamlessly connect forms with MailPoet using WPForms to grow your email list. In this article, we’ll show you how to add a MailPoet subscription checkbox to any form on your WordPress website. How Do I Use MailPoet in WordPress? MailPoet is an email marketing service that you can use inside WordPress.
It has a drag-and-drop builder that makes it easy to design custom email newsletters. If you’ve already used drag-and-drop landing page builders like SeedProd, you’ll find MailPoet super easy to use. In MailPoet, you can create different types of emails like: Mailshots Welcome emails with drip email automation Latest post notifications Welcome emails Abandoned cart emails WooCommerce order emails 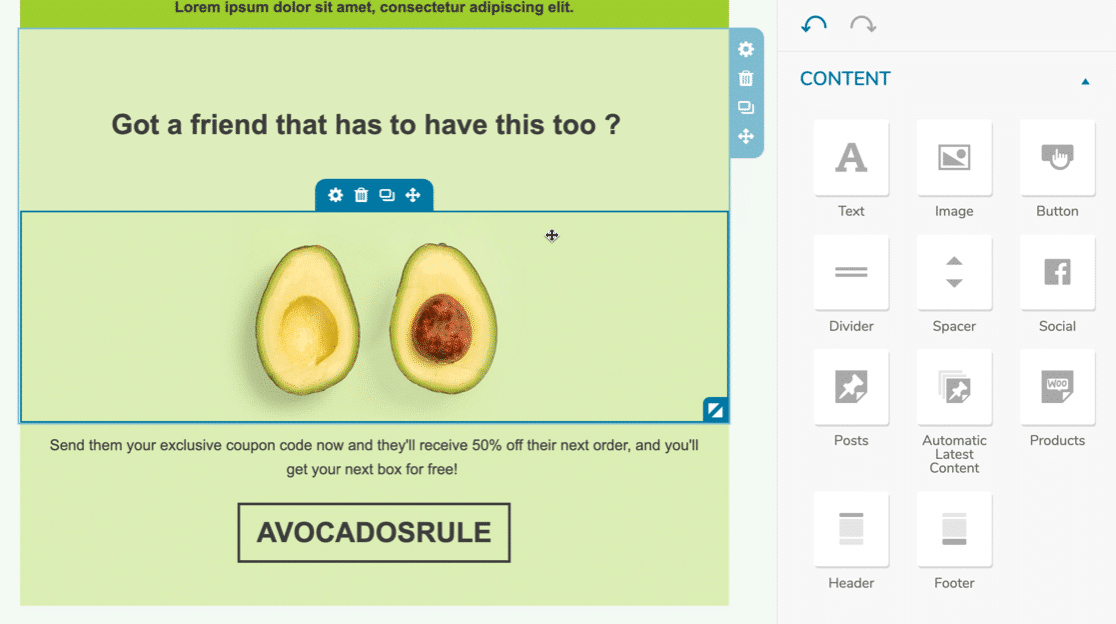 After creating your email template, you’ll just want to tell MailPoet which list or segment you want to send the email to.
It keeps track of all of your subscribers in WordPress and shows statistics about your newsletter open rates. Next, let’s look at how to easily build your MailPoet lists with WPForms. Build Your WordPress Form Now How to Create a MailPoet WordPress Form We’re going to show you how to integrate WPForms and MailPoet directly within the WPForms settings.
Here’s a quick summary of the steps: Step 1: Install the WPForms Plugin. Step 2: Install and Activate MailPoet. Step 3: Configure the MailPoet Connection. Step 4: Add MailPoet Integration to Your Form. Step 5: Customize Your Contact Form. Bonus: Test Your MailPoet WordPress Form Step 1: Install the WPForms Plugin WPForms is the best form builder plugin for WordPress. It lets you create any type of WordPress form using a drag-and-drop builder. And it has different types of spam protection you can use on any form.  In all versions of WPForms, you can accept payments with Stripe.
Show full descriptionShow less
But with WPForms Pro, you can: Store all of your form entries in the WordPress dashboard Create surveys and polls Accept payments with Square and PayPal Track the user’s journey through your site Make multi-step forms with progress bars And more So let’s download and install the WPForms plugin now. Don’t forget to activate the plugin before moving on. Step 2: Install and Activate MailPoet Now, make sure that the MailPoet plugin is installed and activated on your WordPress site.
Go to WPForms » Settings and click on the Integrations tab. 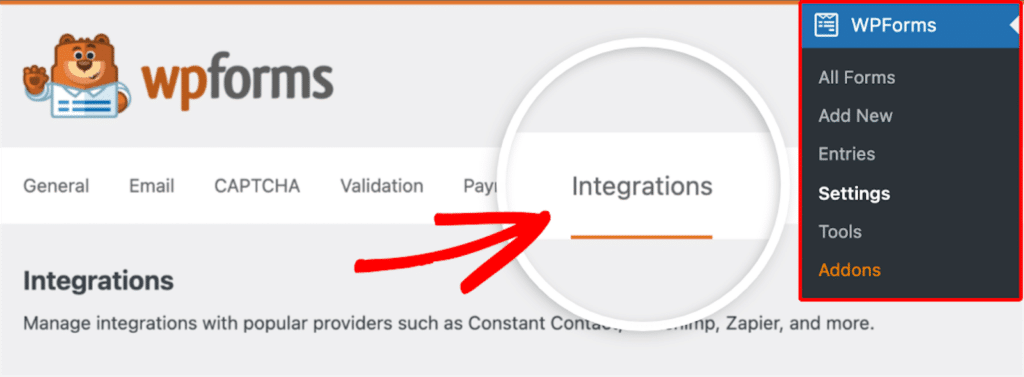 Locate the MailPoet option and proceed to install the MailPoet plugin from there.
 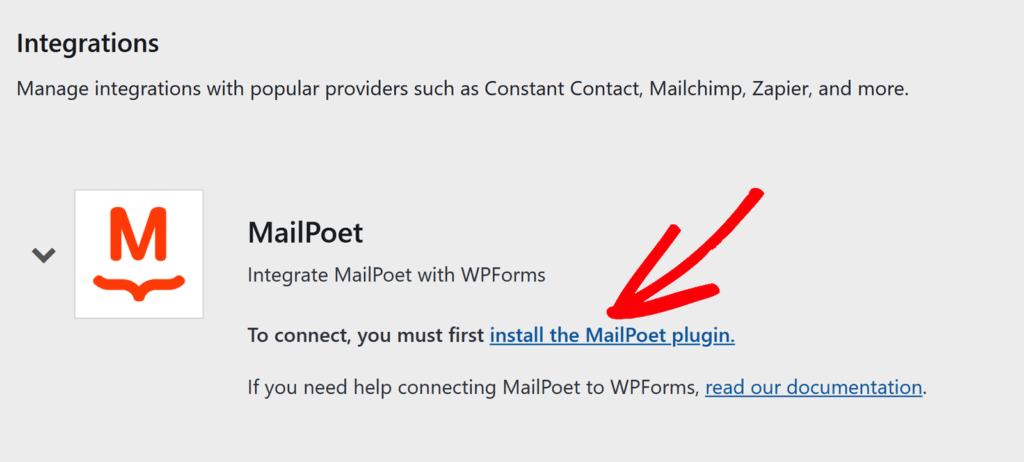 This step will automatically take you to MailPoet on the WordPress Add New Plugin screen. Here, click Install Now and then Activate to complete the installation of the MailPoet plugin.
 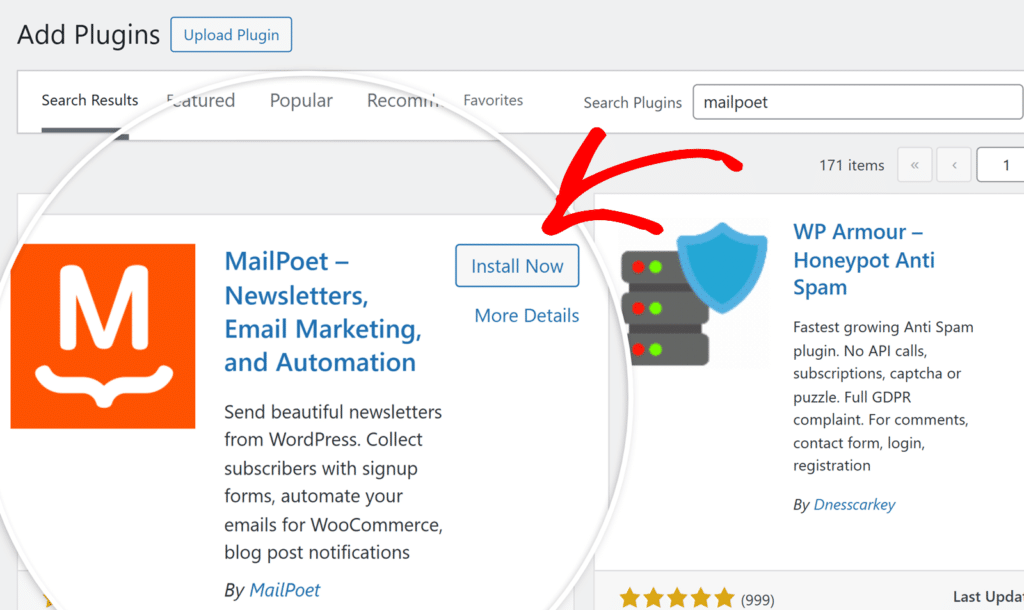 Once the MailPoet plugin is installed, activate it and start the setup by clicking the Begin setup button in the MailPoet welcome page.
  Step 3: Configure the MailPoet Connection By clicking Begin setup, you will launch MailPoet’s setup wizard. Follow the on-screen instructions to complete the basic setup.
You can enter sender information now or skip it and configure these settings later in MailPoet. Once you’ve completed or skipped the onboarding steps, you’ll need to connect your MailPoet account to activate the plugin. Click the Connect MailPoet button, which will open a new tab taking you to the MailPoet website. This is where you’ll need to select a plan and create an account. 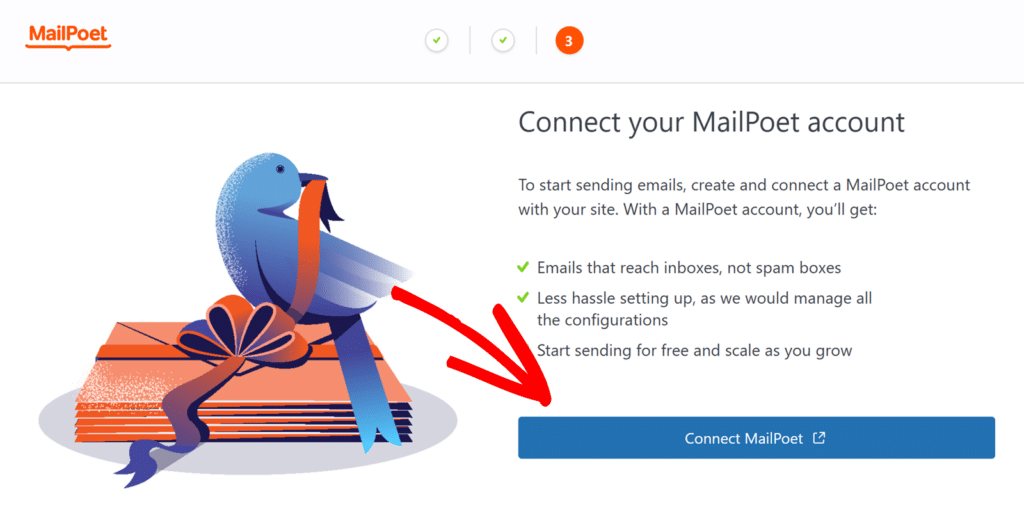 If you already have a MailPoet plan, you can close the new tab that opens.
Simply return to the setup screen where you’ll see the Activation key field. If you already have a MailPoet plan, you can close the new tab that opens. Simply return to the setup screen where you’ll see the Activation key field. With your MailPoet account created and plan selected, navigate to the Account page from MailPoet and locate the subscription information.
Next, click the Copy button to copy your activation key. 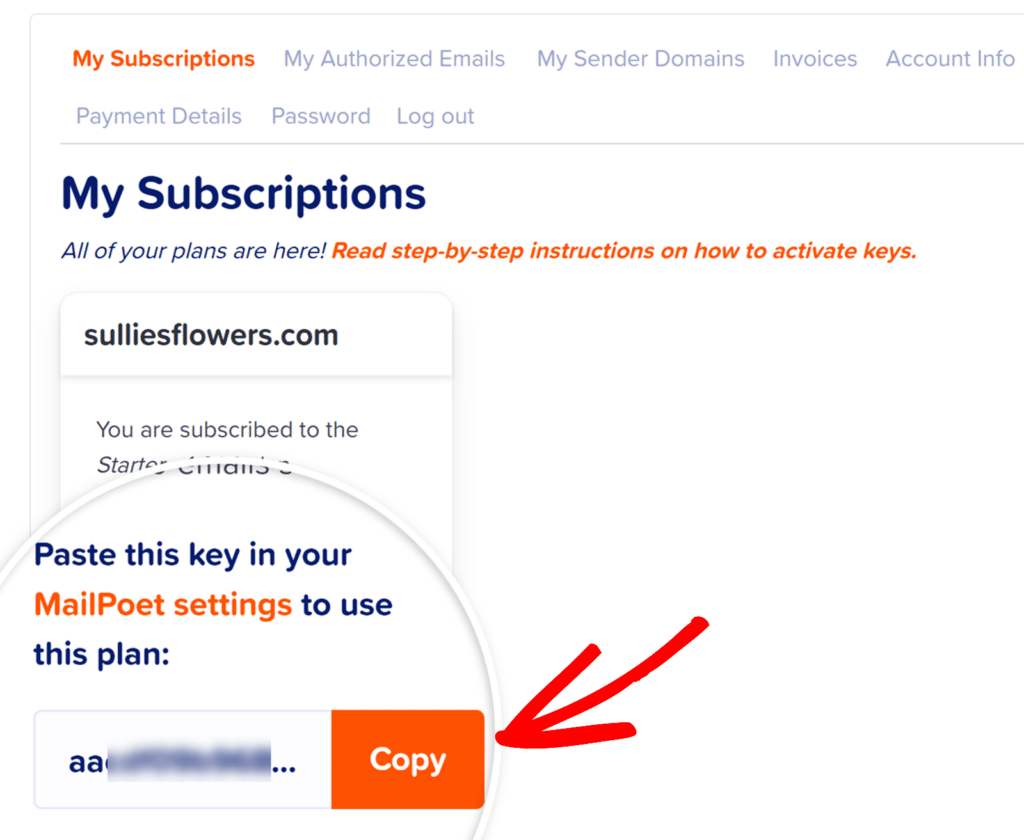 Then, return to your WordPress site where the MailPoet activation page is open, paste the activation key into the Activation key field, and click Verify account.
  Once your key is verified and MailPoet is connected, you’re ready to integrate it WPForms. Step 4: Add the MailPoet Integration to Your Form Now we’re going to make a contact form that will sign visitors up to your MailPoet list automatically when it’s submitted. If you already have a form set up in WPForms, open it up now and navigate to the Marketing » MailPoet section.
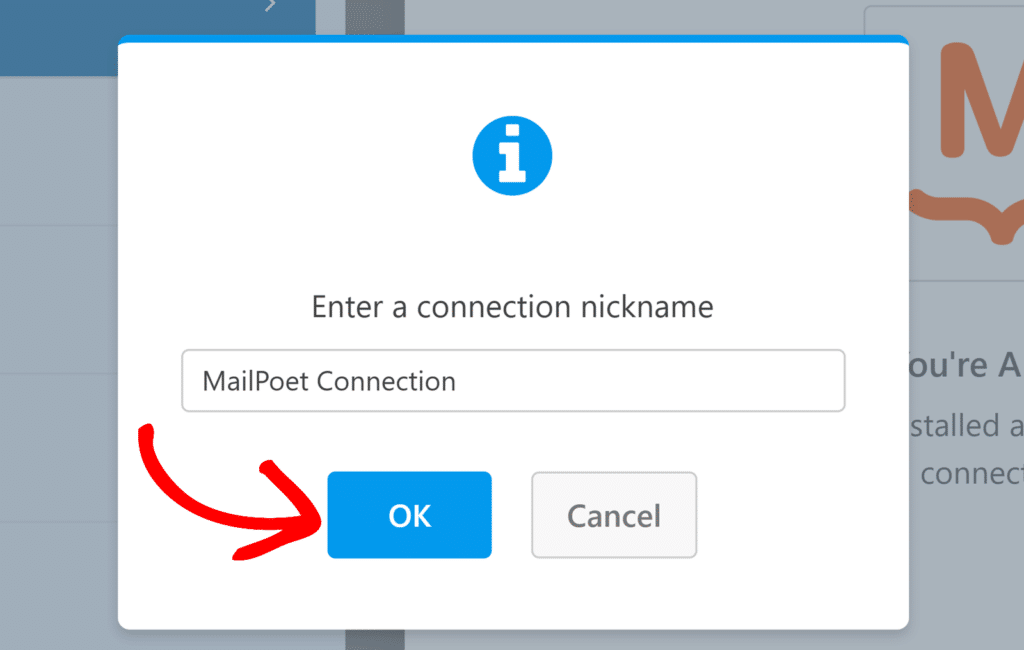
Click the Add New Connection button to create a new MailPoet connection for your form. 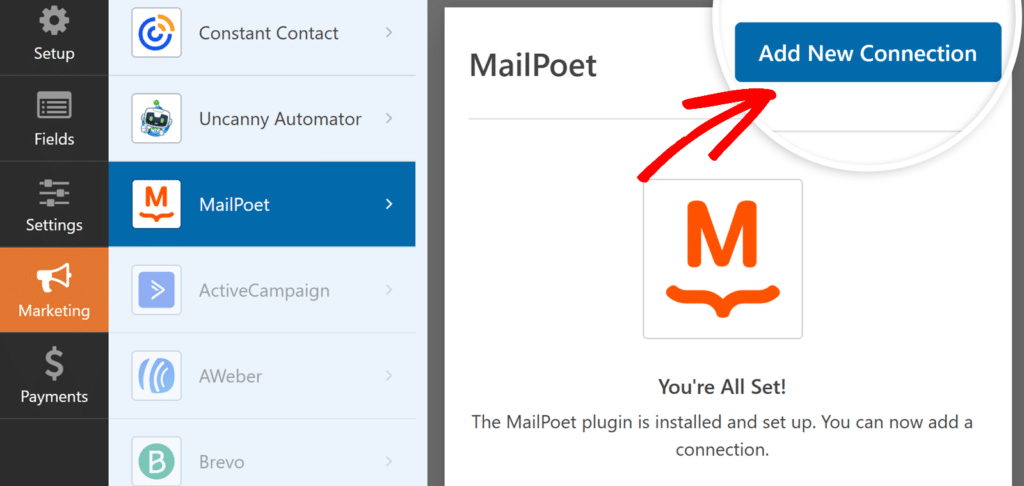 In the overlay that appears, enter a connection nickname. You can use any nickname you’d like, since this won’t be visible to your users. Once you’ve added a nickname, click the OK button.
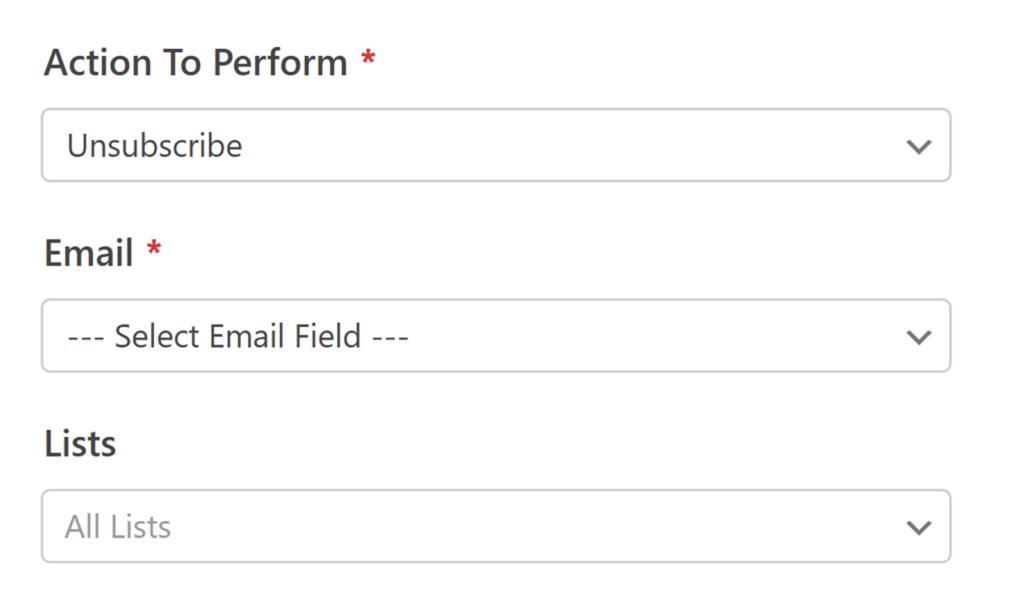
  Next, you need to configure your subscription settings, such as choosing between Subscribe or Unsubscribe actions and mapping form fields to MailPoet lists.
Subscribe Clicking Subscribe will add users to your MailPoet email list when they submit the form. Once selected, additional settings will appear: Email: Choose the form field that collects the subscriber’s email address. Lists: Select the MailPoet list(s) where new subscribers should be added. Custom Fields: Map your WPForms fields to MailPoet custom fields to collect additional subscriber information beyond their email address.
Click the blue plus (+) button to add more mappings. 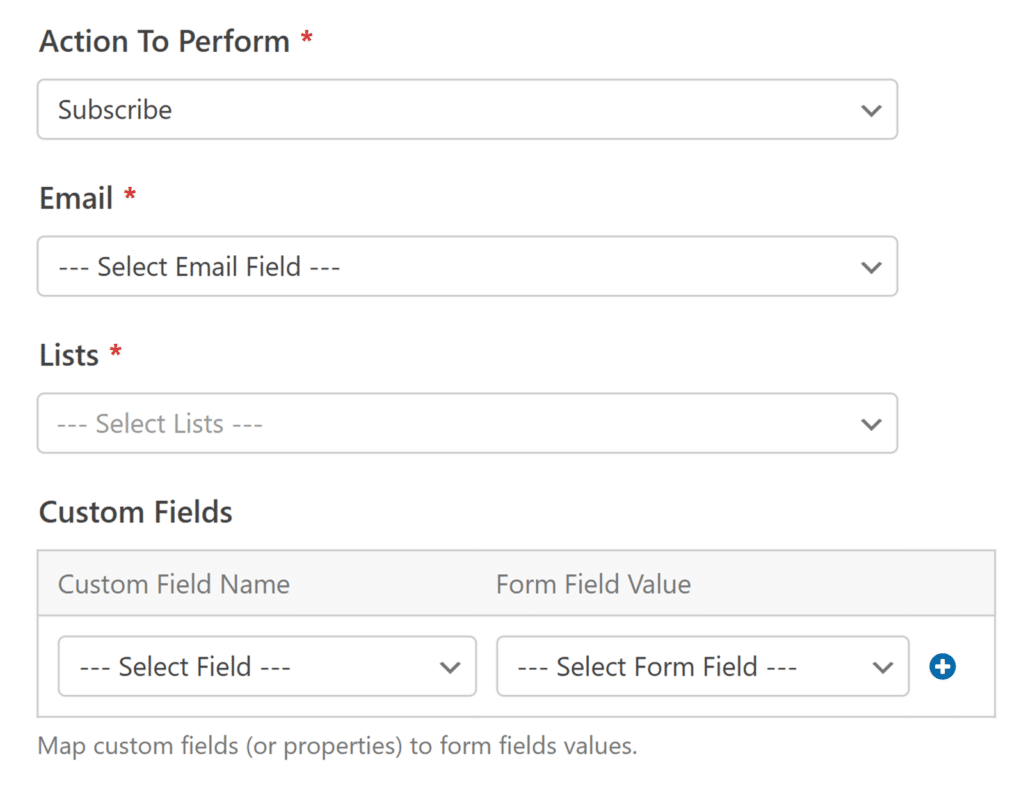 Unsubscribe Selecting Unsubscribe will remove users from your MailPoet email list. This is useful for unsubscribe forms. After choosing this action, you’ll need to configure these options: Email: Choose the form field that contains the subscriber’s email address. Lists: Select the MailPoet list(s) from which users will be unsubscribed when they submit the form.
  Step 5: Customize Your Contact Form Now that the MailPoet integration is configured on your contact form, let’s finish customizing the form.
Adding Separate Name Fields By default, WPForms has a First Name and a Last Name field. These 2 fields are combined into a single ‘Name’. MailPoet stores the First Name and Last Name separately, so let’s tweak the form to match that. First, drag a Layout field onto your form. 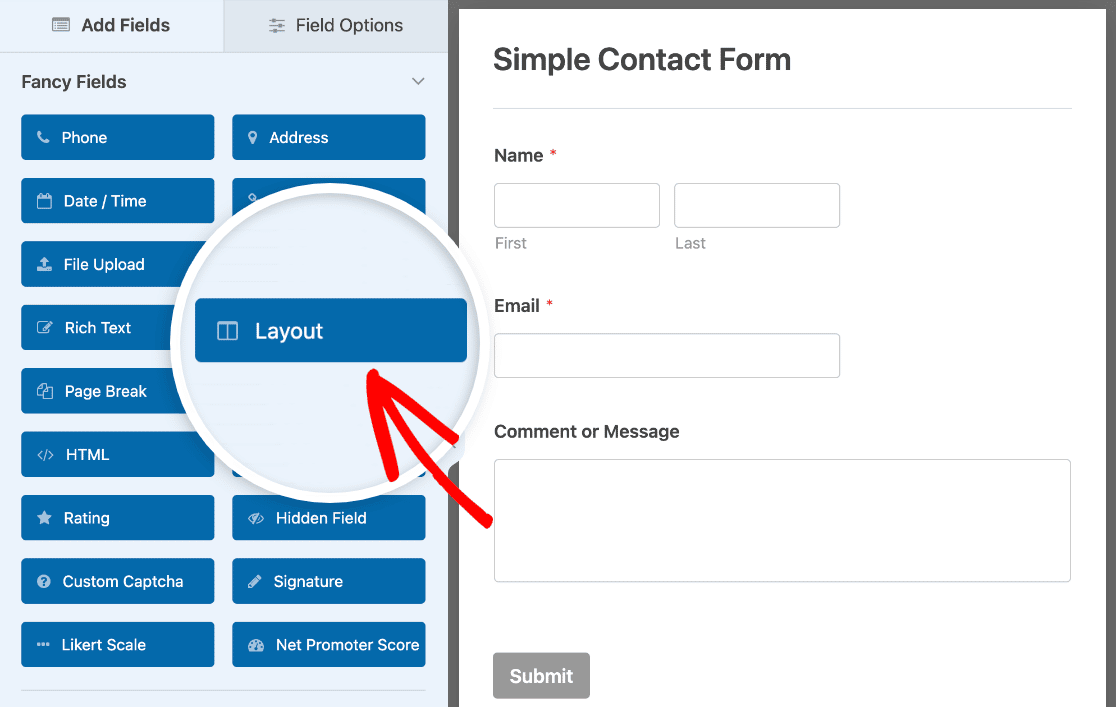 Then drag 2 Single Line Text fields into the columns of the Layout field so that they’re side by side.
We’ll use these as our First Name and Last Name fields. 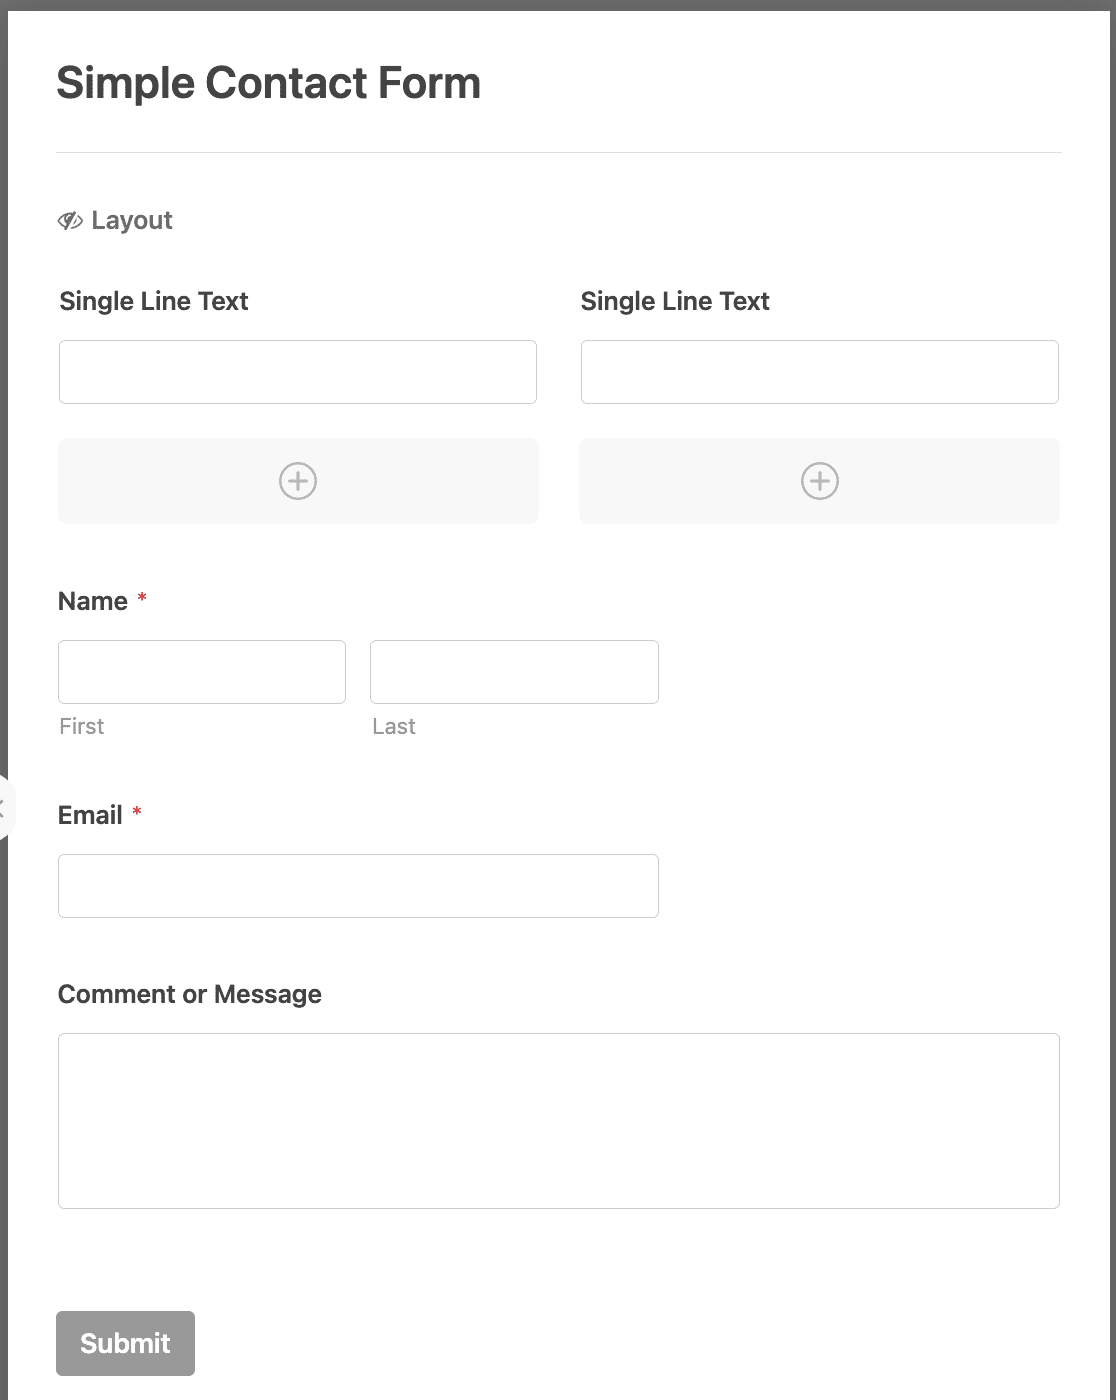 Click on the 1st Single Line Text field to open its field options. Then change the Label to First Name.
 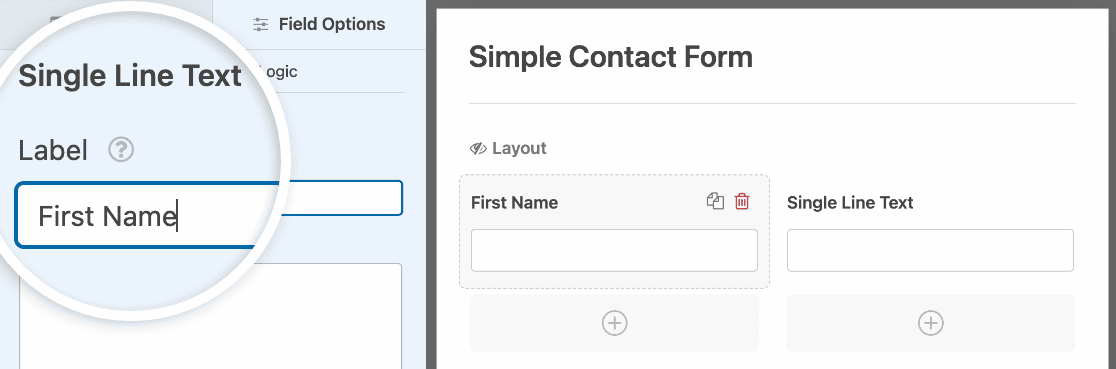 Do the same thing for the 2nd Single Line Text field, but label it Last Name. Now your form should look like this:
 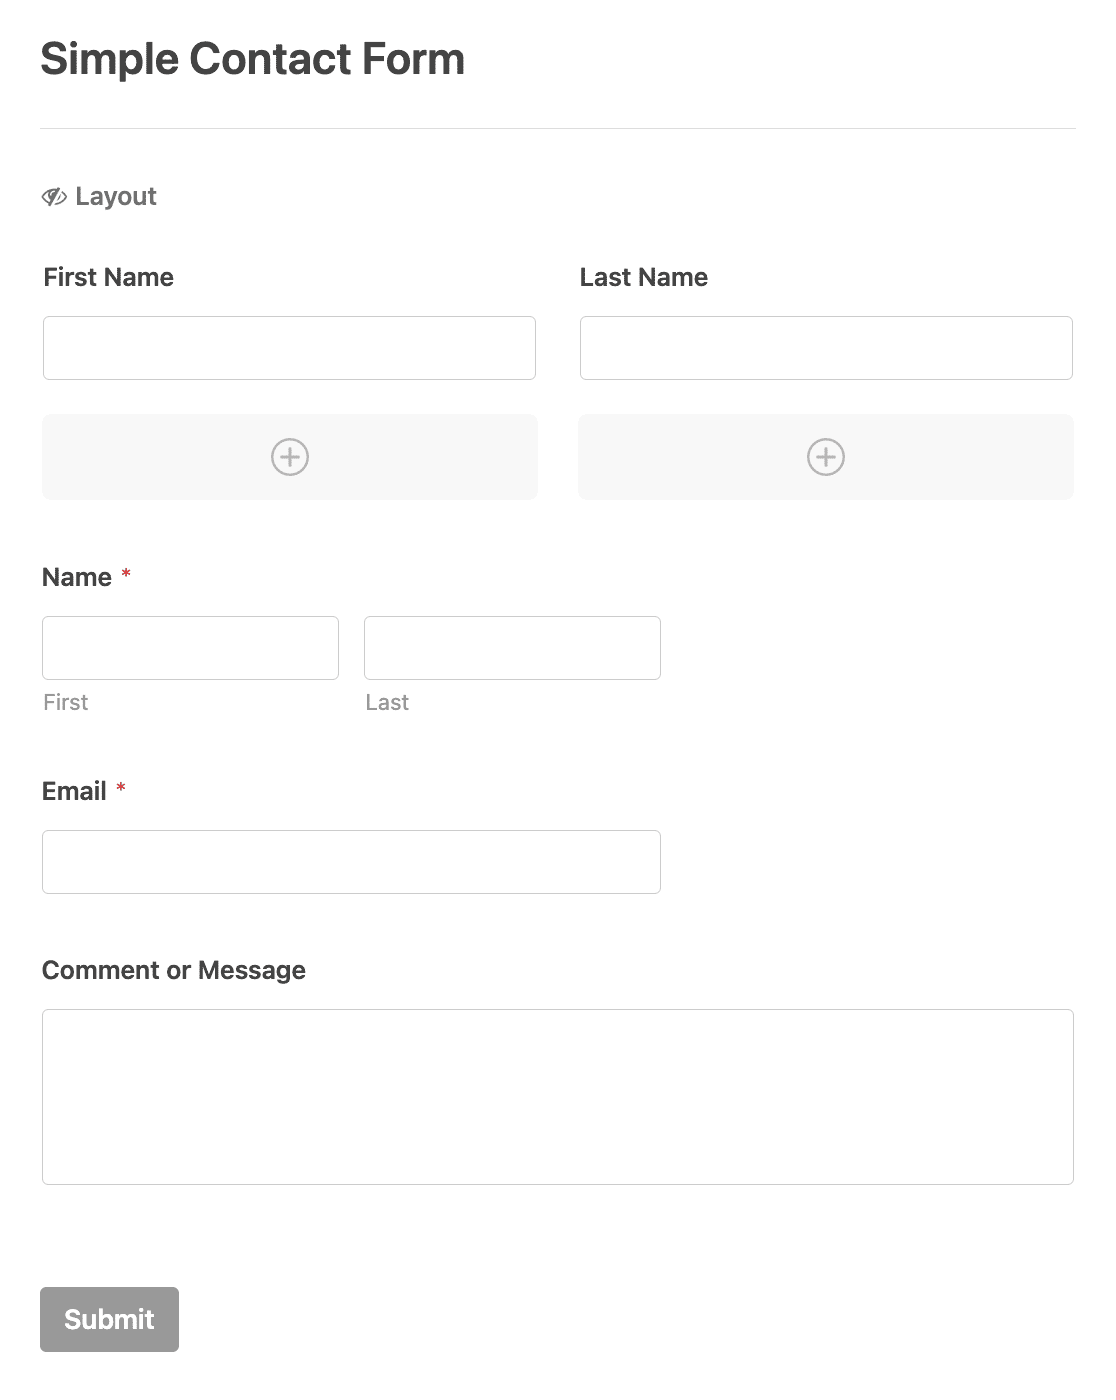 Great! Now we have 2 separate fields for the visitor’s first and last name.
Don’t forget to delete the original Name field by hovering over it and clicking on the trash can. 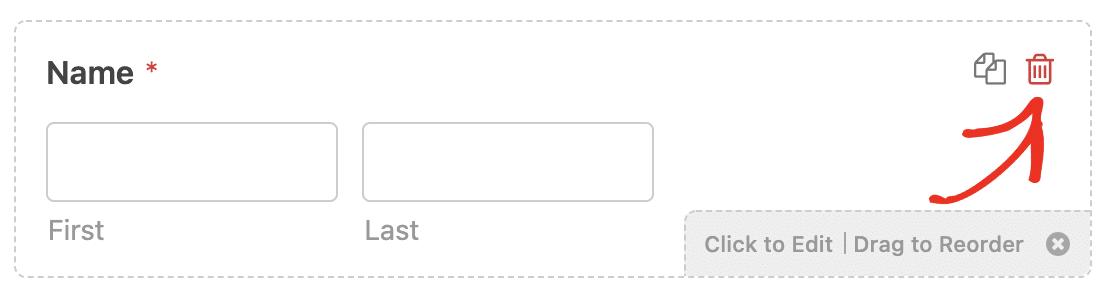 Adding an Optin Field The GDPR is an important law that protects personal data. Whenever you create a signup form, you should get the person’s explicit consent. To do that, we can add a MailPoet optin checkbox to your form. If the optin field is not checked, they won’t be added to your MailPoet list.
Start by dragging a checkbox field onto your form. We’re going to add a little text to explain what it’s for. 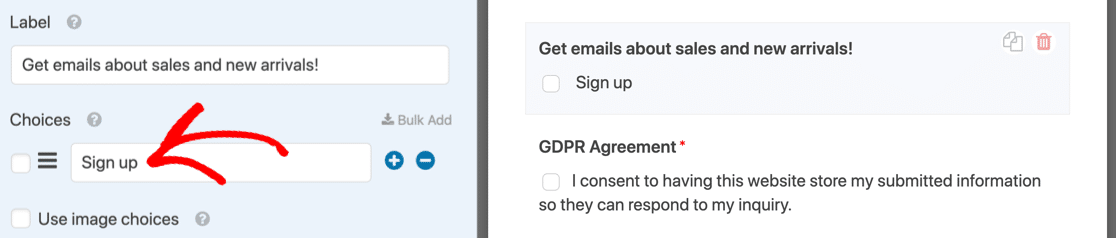 Make a note of the exact text you use in the Choices field — we’ll need to use it later. You’ll probably also want to add a GDPR field to your contact form which covers the storage of their data. If you’re not sure if you need this, we recommend that you consult a lawyer for GDPR guidance.
Enabling Conditional Logic (Optional) Conditional logic allows you to control when the MailPoet integration runs based on users’ form selections. For example, you can set it up so that only users who choose to subscribe are added to your MailPoet list. Toggle the Enable Conditional Logic option to create your rule. 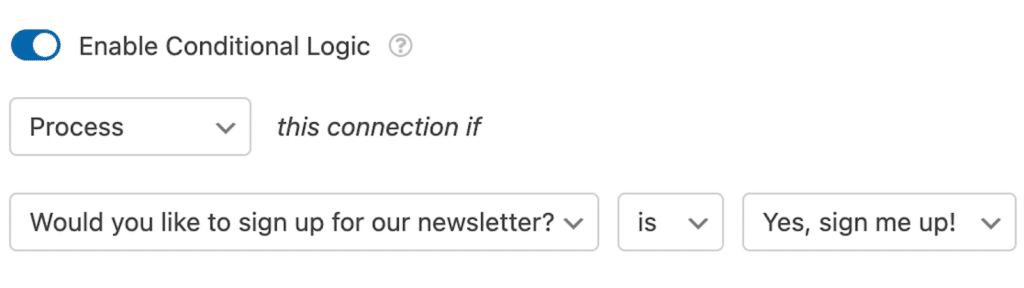 Checking Your Form Settings Before we finish up in WPForms, it’s a good idea to check your form Notifications and Confirmations.
To start, click Settings on the left-hand side of the form builder. 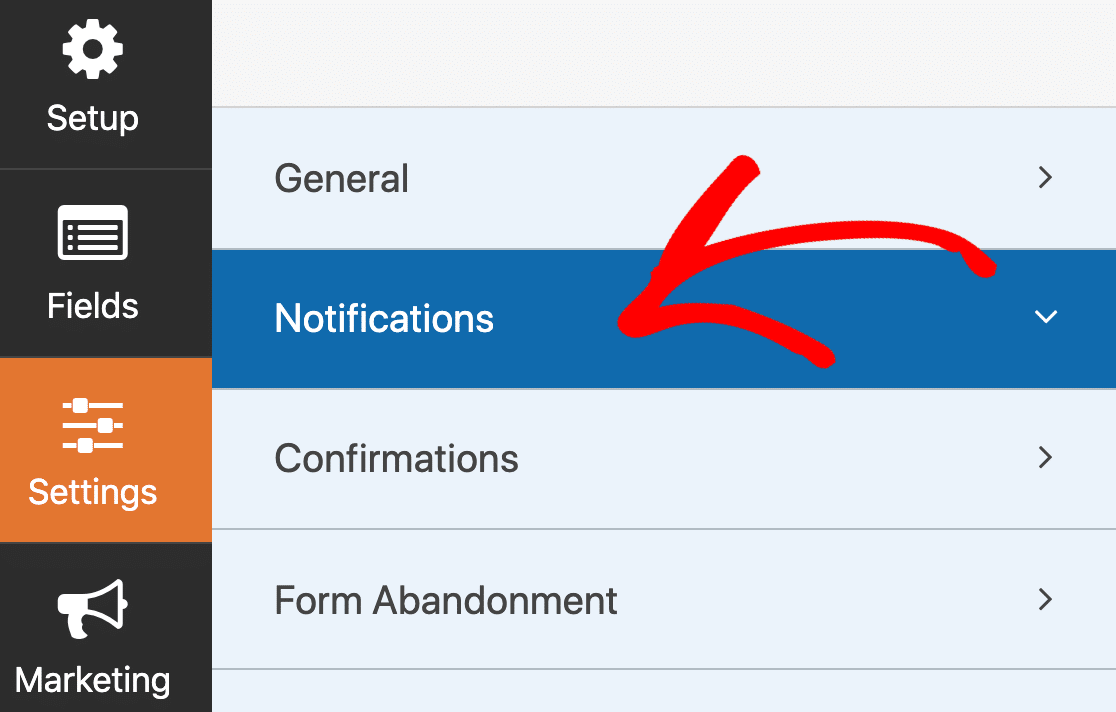 Notifications are emails that are sent out when the form is submitted. Since this is a contact form, you’ll want notifications turned on. See this guide if you need help setting up your form notifications. The Confirmation is the message that shows on screen after the form is submitted.
Take a look at how to edit the form confirmation message. When your form settings are set up the way you want them, click Save. That’s it! Now every visitor who uses your contact form can opt in to your MailPoet list. Bonus: Test Your MailPoet WordPress Form It’s always a good idea to test out new integrations. Fill in your contact form and submit it to ensure everything works as expected.
Check under MailPoet » Subscribers to see if your new subscriber appears in the correct list. Build Your WordPress Form Now Next, Create a Blog Post Notification Form There are tons of different ways you can use WPForms with MailPoet to get more subscribers. For example, try making a WPForms signup form with an email address field, then add it to your blog using a sidebar widget.
Then connect your form to MailPoet’s Post Notification newsletter.  Now you can automatically update subscribers every time you post new content. Creating a landing page for your form is a smart idea too. It removes all of the distractions that might otherwise hurt your conversion rate. And it’s easy to make a landing page in WPForms. Check out these landing page form examples to get inspiration.
Ready to build your form? Get started today with the easiest WordPress form builder plugin. WPForms Pro includes 2,000+ form templates and offers a 14-day money-back guarantee. If this article helped you out, please follow us on Facebook and Twitter for more free WordPress tutorials and guides.
Recent releases
Release history
Frequently asked questions
Is WPForms – MailPoet Addon GPL licensed?
What is the latest version of WPForms – MailPoet Addon?
How much does WPForms – MailPoet Addon cost on GPLCoffee?
Which WordPress and PHP versions does WPForms – MailPoet Addon support?
Is WPForms – MailPoet Addon safe to download?
Auto-updates included
Install it once, update automatically.
The GPLC Connector installs this plugin from your wp-admin and rolls out new versions to your connected sites - up to 25. Included with 12-month and Geek Lifetime plans (plus legacy 6-month).